
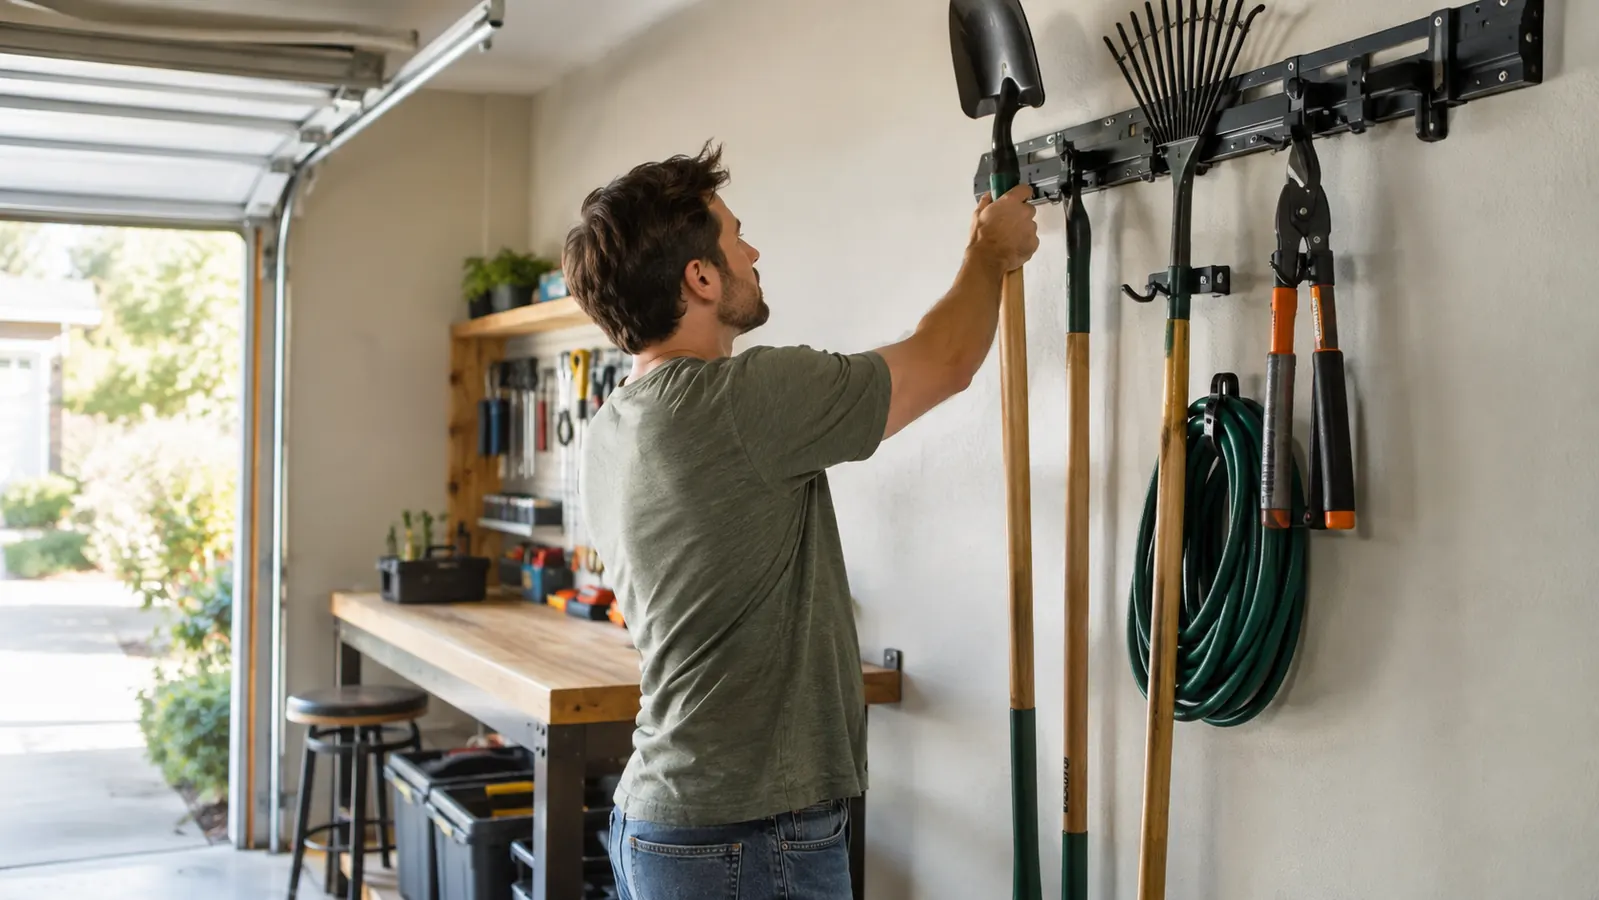
The rake handle got me in February. I had just finished turning the raised beds out back, and I backed up without looking. My heel came down on the rake handle, the handle rolled, and I went over sideways onto the concrete floor of the garage. I spent the next six weeks with a wrapped wrist and a lot of time to think about why that rake was on the floor in the first place.
That's the honest starting point for this review. I didn't buy the Rubbermaid FastTrack rail kit because I wanted a prettier garage. I bought it because I was tired of tripping over long handles and tired of the pile of tools that lived against the wall. After six months of real use, here's what I think, including the parts nobody puts on the package.
The garage is a working space, not a showroom. I keep one car in it, and the other bay is where I do the projects. That means every square foot of floor counts. The pile of rakes and shovels against the wall was costing me more than space. It was costing me the ability to move through my own garage without watching my feet.
The Quick Verdict
The rails are excellent, the price is fair, and the system does exactly what it promises. The weak point is the included hooks, which run out fast, and the plastic anchors, which I wouldn't trust in a garage. Mount into studs, budget for extra hooks, and this is a genuinely good buy.
Amazon Check Today's Price →Get your long handles off the floor before the next one finds your ankle
The FastTrack rail kit is the most straightforward wall storage I've installed in thirty years of building maintenance. If you're ready to clear the floor of your garage or shed, this is where I'd start.
Amazon Check Today's Price on Amazon →How I've Used It
I installed the FastTrack on the wall of my workshop bay, the side of the garage where I keep the bench and the garden tools. The kit comes with four rails, and I ran them end to end across about fourteen feet of wall, which gave me one long track at a height that cleared my head and stayed easy to reach. I mounted it into the studs, which I'll get to in a minute, and I leveled the first rail with a four-foot level before I tightened anything. I marked the studs with a pencil, drilled pilot holes, and snugged every screw before I tightened anything down.
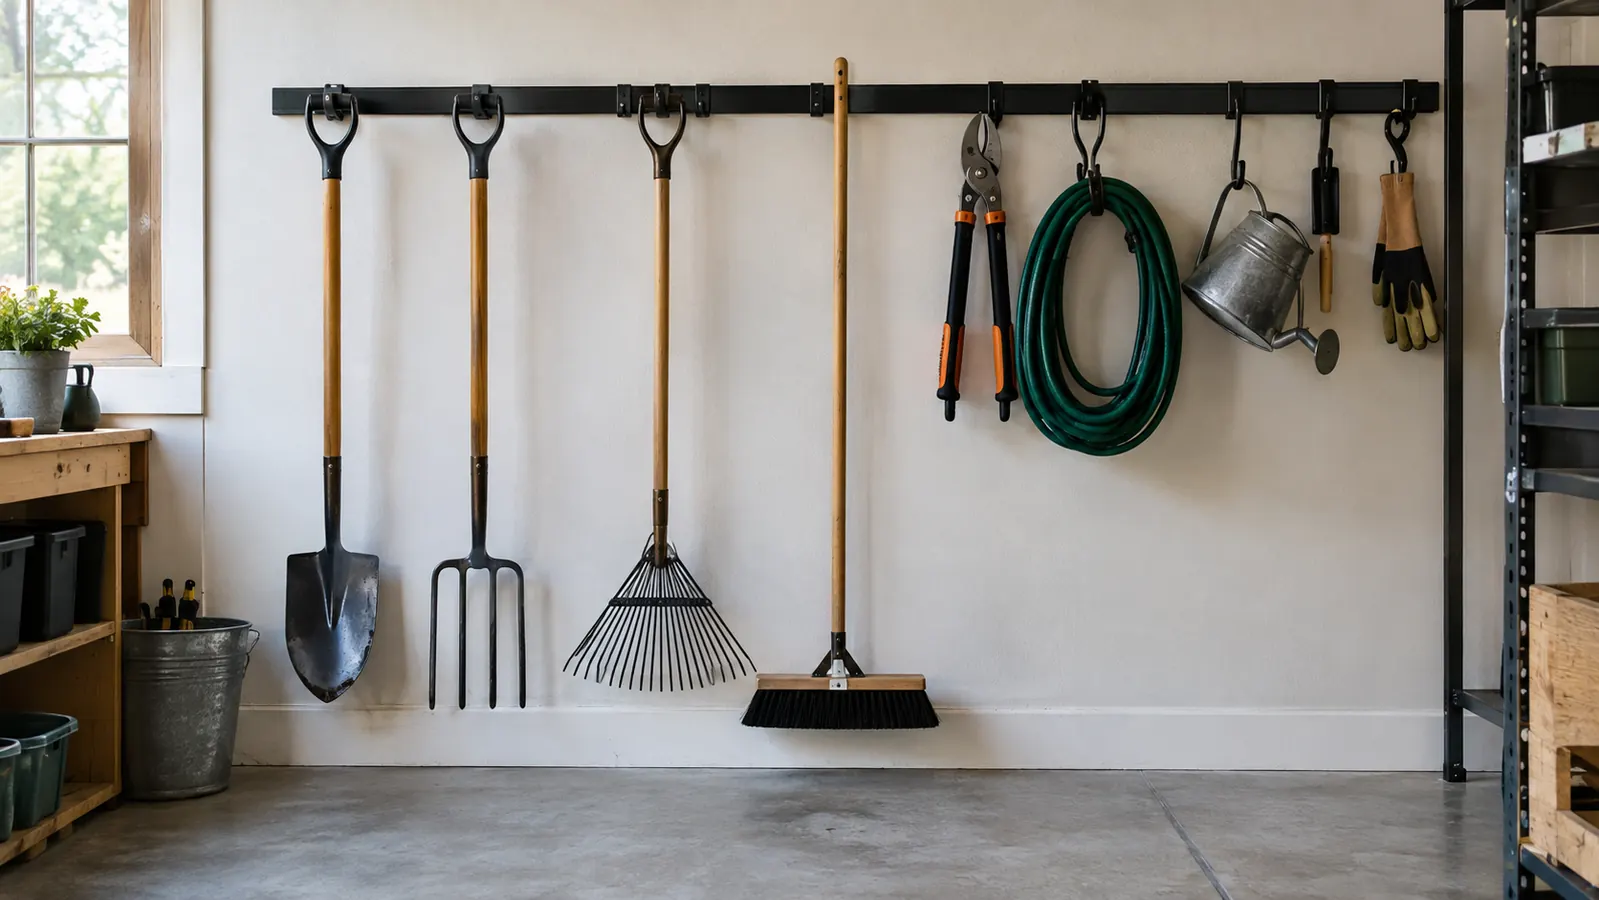
I hang the long stuff on the rail: two shovels, a spade, three rakes, a hoe, a cultivator, and a leaf blower. The rail holds the handles, and the hooks hold the heads. I also added a couple of hooks for extension cords and a garden hose, which used to live in a tangled heap in the corner. The shed out back still holds the bulky stuff, but the tools I reach for every week now live on the garage rail.
Six months in, the rail hasn't moved. The screws haven't loosened. The aluminum rail hasn't sagged, and I've loaded it heavier than I probably should have. The only thing I've changed is the hook arrangement, because the kit only includes so many hooks and I needed more.
The bench sits under the rail, which works out well. I can grab a shovel, do the job, and hang it back without taking two steps. The rail keeps the handles out of the way of the bench top, and the bench keeps the small stuff off the rail. It's a system now, and it took one afternoon to set up.
What Nobody Tells You Before You Buy
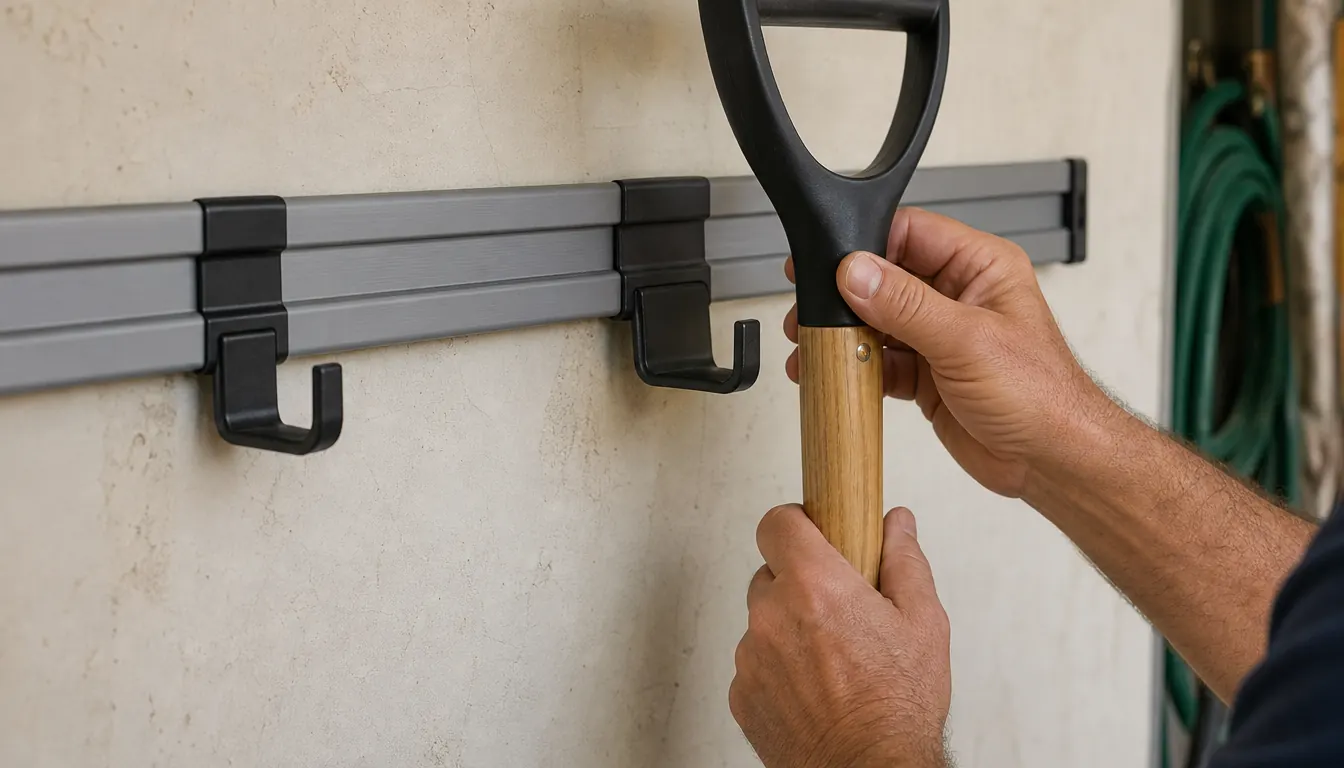
The first thing nobody tells you is that the included hardware is the weakest part of the kit. The rails themselves are solid aluminum, and the design is simple and proven. But the kit comes with plastic anchors and screws sized for drywall, and on a garage wall, drywall anchors are a gamble. I mounted into studs from the start, and I'd tell anyone else to do the same. If you can't hit a stud, use a proper toggle bolt instead of the plastic anchor that comes in the box. The anchors are fine for a towel bar in a bathroom. They are not fine for a loaded shovel in a garage.
The second thing is the hooks. The kit includes a handful of hooks, and they cover the basics: a couple of single hooks, a double hook, and a utility hook. But if you have a real collection of tools, you will run out of hooks. I bought extra hooks within a month, and I'd budget for that up front. The rail is the cheap part of the system. The hooks are where the cost adds up.
The third thing is the adhesive mounting you'll see mentioned for this system. The honest truth is that adhesive will not hold a loaded shovel in a garage that gets hot in the summer and cold in the winter. The temperature swings in my garage were enough to make me ignore the adhesive option entirely. Screw the rail into the wall. That's the only mounting method I trust.
The hooks slide into a channel on the front of the rail, so you can reposition them without unscrewing anything. That sounds small, but it's the difference between a system you adjust and a system you live with. I moved three hooks the first week, and it took about a minute.
The last thing I'll mention is that the rails are sold in fixed lengths, so you plan around corners rather than around the rail. If your wall is an odd length, you either leave a gap or you cut the rail to fit. I left a gap at the end of my run, and it doesn't bother me.
How the FastTrack Holds Up With Real Use
The test that matters to me is whether the rail holds what I actually own, not what the box shows. My heaviest item is a 42-pound leaf blower, and it hangs on a utility hook at the end of the rail. Six months of hanging, including a summer of near-daily use, and the rail hasn't sagged. I checked it once out of curiosity, and there was no measurable deflection.
The coated hooks have held up too. The coating has worn a little where the shovel handles rub against it, but it hasn't chipped off or gone brittle. The hooks themselves are thick enough that they don't bend under a loaded handle. I've taken tools on and off the rail hundreds of times this season, and I haven't had a hook straighten out or a tool fall.
The rails still look like the day I installed them, aside from a few scuffs where I've bumped them with a shovel head. The finish has held. And the floor of my garage is finally clear enough that I can walk through with an armload of supplies without checking my feet.
The winter test is still ahead of me, and I'm not worried. The garage gets below freezing every January, and the rail has already seen a season of temperature swings without the screws backing out or the finish failing. If it survives a Nebraska winter, it'll survive most garages.
The extension cords hang on their own hooks at the end of the rail, and they stay where I put them. That used to be a tangle I fought every time I needed the hedge trimmer. Now I grab the cord, use it, and hang it back. It sounds small, but it's the difference between a garage that works and a garage that fights you.
The rail has held a 42-pound leaf blower, three shovels, and a hoe for six months without sagging a quarter of an inch. That's the number that matters to me.
The Installation Reality
Installation is straightforward, but it rewards patience. The rails are four feet long, and the holes are pre-drilled, so the spacing is already decided for you. What you need to do is find your studs, mark the height, and level the first rail carefully, because every rail after it lines up off the one before it.
I used a stud finder and a four-foot level, and the whole job took me about an hour and a half, working alone. That includes the trip to the basement for a drill bit I couldn't find. If you've hung a shelf before, you can hang this. If you haven't, give yourself an afternoon and check the mounting height twice before you drill.
The one mistake I made was the height. I mounted the first rail at a height that felt right when I was standing flat-footed, and then I realized I couldn't reach the hook on the far end of the rail without stretching. I moved it down four inches, and that made all the difference. Measure with the tool in your hand, not with your hands empty.
You'll want a stud finder, a level, a drill with a bit that matches the screws, and a socket or driver for the heads. The kit includes the screws and anchors, but not the tools. That's not a complaint. It's just worth knowing before you start, so you're not halfway up a ladder with the wrong bit.
I did the job solo, and it's doable, but an extra pair of hands makes the first rail easier because you can hold it in place while the other person marks the holes. If you have a helper, use them for the first rail.
How It Compares to the Alternatives
Before I settled on the FastTrack, I looked at pegboard and at the simpler single-track systems. Pegboard is fine for small tools and hand tools, but it struggles with long handles. A shovel handle is four feet long, and a pegboard wall starts to look ridiculous once you hang a few of those. The FastTrack handles the long stuff cleanly, and it holds the weight without the sagging problem pegboard has.
The other rail systems I looked at were variations on the same idea, and a few of them cost more without adding anything I could see. The Rubbermaid rails are thicker than the cheapest options, and the hook selection is bigger than the bare-bones kits. For my money, the FastTrack was the best balance of price, weight capacity, and hook availability.
I should also mention that I looked at a wall-mounted rack that holds tools by the handle, and it worked fine for shovels but not for anything with a curved handle. The FastTrack hooks accept just about any handle shape, which is why I kept it. If you have odd-shaped tools, that flexibility matters more than you'd think.
What I Liked
- Solid aluminum rails that don't sag under heavy loads
- Simple, repeatable installation once you find the studs
- Hooks slide along the rail so you can adjust the layout anytime
- Modular system, easy to add more rails and hooks later
- Frees up floor space fast and keeps long handles off the ground
Where It Falls Short
- Included hooks run out quickly; budget for extras up front
- Plastic drywall anchors are the weak link; use studs or toggle bolts
- Adhesive mounting is not worth trusting in a garage
- Fixed rail lengths mean you plan around corners or cut to fit
What I'd Do Differently
If I installed this again, I'd buy the extra hooks at the same time as the kit, not a month later. The kit gives you enough to get started, but the second trip to the store is avoidable. I'd also mount the rail a little lower than I did the first time, and I'd mark the stud locations on the wall with a pencil before I started, because the paint hides them once the rail goes up.
The other change is the hook mix. I started with what came in the box, and I ended up buying more utility hooks and fewer single hooks. The utility hooks carry the heavy stuff, and the single hooks are best for light tools like a hand trowel or a pruner. Think about what you actually own before you order extras, and you'll get the mix right the first time.
One more thing. I keep a spare hook on the rail even when it's not holding anything. It costs nothing, and it means the next tool I buy has a place to go before it ends up on the floor.
Who This Is For
This is for anyone who keeps long-handled tools in a garage, a shed, or a basement and is tired of playing pick-up-sticks every time they need a shovel. It's for people who want a storage system they can install in an afternoon without a carpenter's license. It's for the person who has tried stacking tools in a corner and watched the pile get worse every week. If that's you, the Rubbermaid FastTrack rail is a fair trade for the floor space it gives back.
I'd also say this is for anyone who has a shed like mine, eight by ten, with more tools than shelves. The rail works on a shed wall just as well as a garage wall, and it frees up the floor for the things that have to sit on it. If you have a wall and a pile of long handles, you have a place for this system.
Who Should Skip It
Skip it if you only own a handful of tools and a single hook by the door is enough. Skip it if you rent and can't put screws into the wall, because the adhesive option won't hold up to real use in a garage. And skip it if you expect the kit to come with everything you need for a fully organized wall, because the hooks are the part you'll be buying more of. The rail is the foundation, not the whole system.
It's also not the answer if your problem is small hand tools, because the rail is built for long handles and heavier gear. For screwdrivers and wrenches, a simple pegboard or a magnetic strip is cheaper and works better. The FastTrack solves a specific problem, and it solves it well, but it's not a whole-garage solution on its own.
The rail is the cheap part. The floor space is the win.
If your garage looks like mine did, with rakes and shovels leaning against the wall, the Rubbermaid FastTrack rail kit is a solid first step. Mount it into studs, buy a few extra hooks, and you'll wonder why you waited.
Amazon Check Today's Price on Amazon →